

August 11, 2016
August 2, 2016
Baked Chicken with Garlic and Ginger

It has been raining a lot these few days and on rainy days, I love having everyone sitting together to eat a nice meal. We bought a few packs of cage free, antibiotics free chickens and I've been thinking of different recipes for them. It seems like a great night for baked/ roasted chicken. They turned out really good; very juicy and tender.
I'm going to do my best to write the recipe, to be as detailed as possible .. because I enjoy cooking by "agak-agak". The best way to explain agak-agak is estimation/ intuition. In my mom's days, cooking traditions were handed down from one generation to another without a formal recipe. Everything is agak-agak :)
INGREDIENTS
A
5 Chicken Drumsticks/ Wings
B
Garlic (1 clove)
Ginger (3 inches)
Soy sauce (1.5 tablespoons)
Pinch of Salt
Pinch of Sugar
Mirin (Japanese cooking wine) (1.5 tablespoons)
Sesame Oil (1 tablespoon)
C
Honey
METHOD:
- Rinse the chicken and pat dry with paper towels.
- Blend all the ingredients B
- Rub the blended ingredients on the chicken (gently! like you're massaging someone)
- Set aside for at least an hour. (best if overnight)
- Pre-heat over to 400F and bake for 40 minutes. Remove from oven and glaze with honey. Bake for another 10 minutes, or until the surface turn golden brown. Mr Chan likes it slightly charred so I baked it for another 5 minutes.
Serve warm with baked cauliflowers and peppers.


My Second Sewing Project - Lunch Bag #2
Growing up, I've seen my mom sew countless times. She sewed our school uniforms, she sewed our Pajamas and made quilts and blankets for us. My mom was a self taught "sewist" and sewed during the school holidays and weekends (she's a teacher so she gets a lot of holidays!). While, shamefully unfortunately, I did not pick up the skills from her nor did I even get close to her machine. Somehow the sound of her vintage sewing machine scared me!
Being so far away from home.. I'm always subconsciously looking for little things that would bring me back to the memories of home.. of my childhood, anything that gives me a taste of home. Maybe that is why I would like to sew (ahem - learn to sew)
So we got a new sewing machine and it was set aside for at least 3 months. I was too intimidated to even go near it! Finally, I found some courage and sewed a few straight lines! with the help of Mr Chan. He grew up in a sewing family as well, his mom is a tailor by profession! and he was a professional seam remover ;) I have to give the credit to him for setting up the machine with the help of youtube videos.
This is my first project! here (I will create another posting for this)
Here is my second project! and I still can't believe I made this! For me, it is such a miracle to see how each seemingly simple stitch can create and turn into something useful (I'm not confident to say beautiful yet). I used drapery cotton canvas for this one - it was on clearance sale we found at the Fabric Row, Philadelphia for $2 a yard. Mr Chan is very 'concern' about the fabric pattern that I use and would not want anything with flowers or colors. But I managed to hide some colors inside for the lining :) I think it is just boring without some colorful fabrics. The inside i used cotton fabric for the lining and insul-bright for insulation.
You can see I'm still learning - I know the lines are not straight and they look awful if you look closely.

 |
| Roll top style without the buckles |
 |
| The inside with cotton lining. Love the hidden colors ;) |
 |
| Trying to see what it looks like with a parachute buckle |
 |
| Added the buckles! |
 |
| Its done! |
March 22, 2015
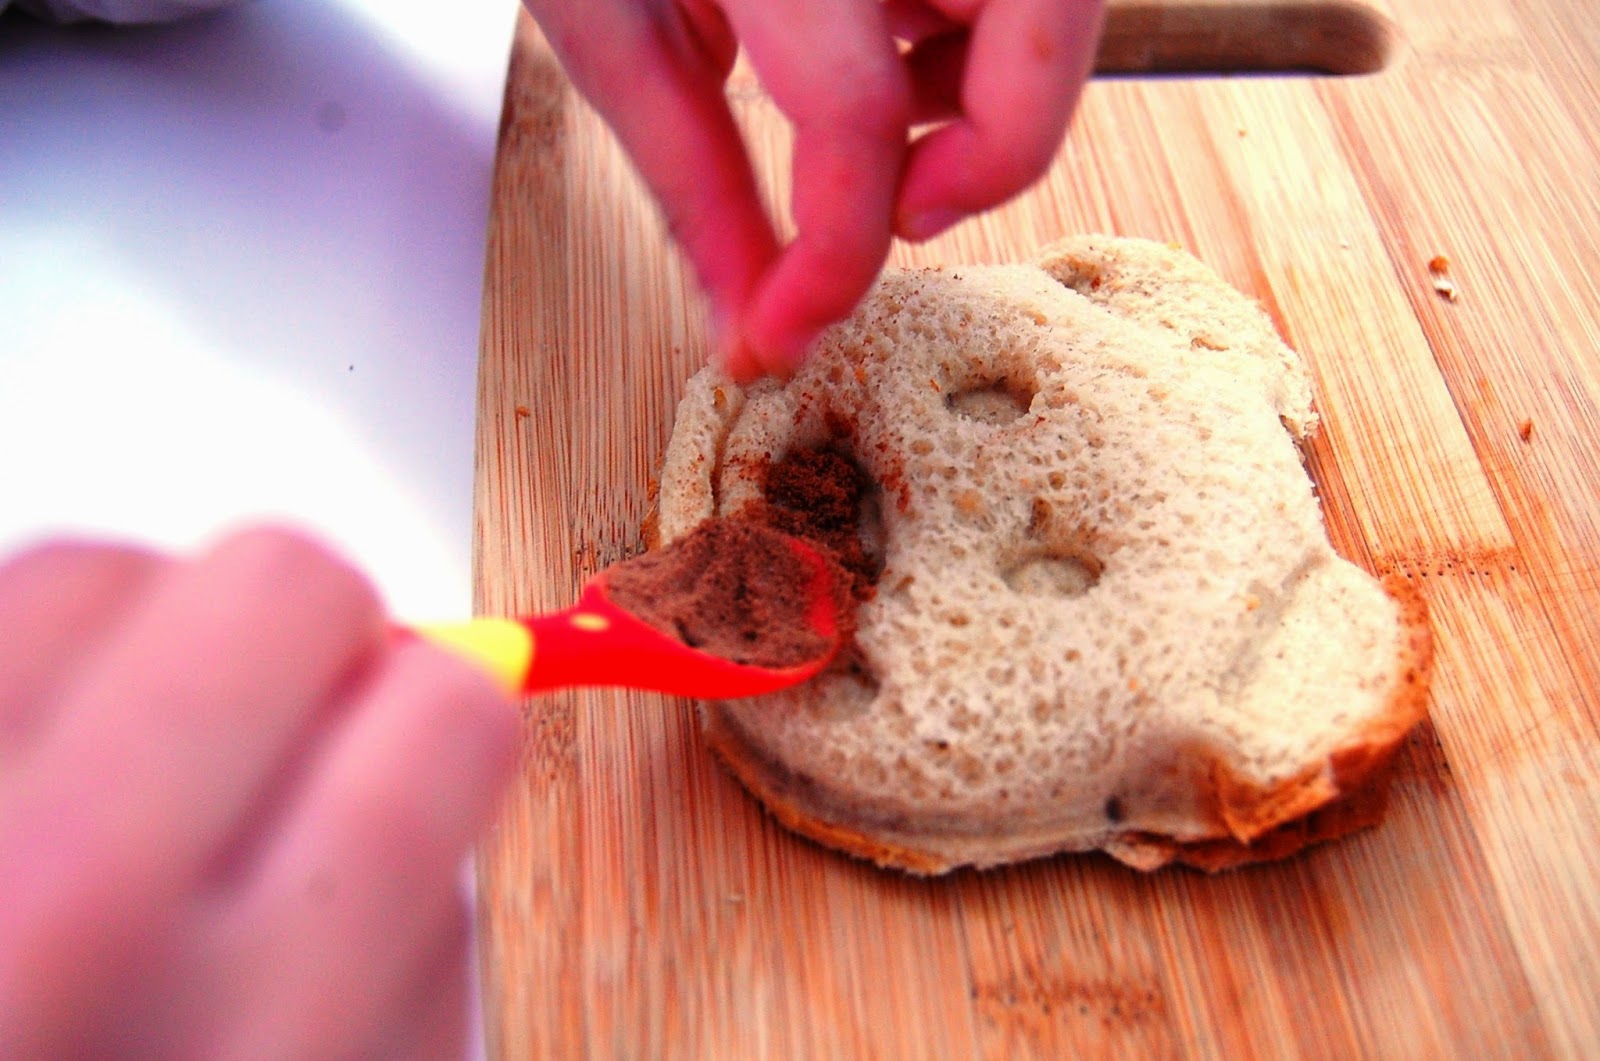
Happy Bear Sandwich
We are so excited to add the happy bear sandwich mold to our collection. It is so cute and so easy to make, our 5 year old makes it almost everyday! It only takes her 5 minutes to get it all together. We have put together a set of instructions here to help you and your child make a fun lunch together.


1. Warm the bread in the microwave
for 20 seconds to soften the bread - we find it easier to cut/mold.
2. Spread a layer of your
favorite jam/ peanut butter in the center of the bread. Be careful not to over stuff the bread or it might
break!
3. Combine slices of bread
4. Place the bear mold on top
of the sandwich. Make sure all the ingredients and sandwich is within the mold.

5. Press the mold gently but
firmly into the sandwich. Also, it helps to press around the edges before
removing the sandwich from the mold.
You can add some cocoa to the eyes and nose to make them pop!
All done. Hello everyone! I’m Mr
Bear.
We will use other ingredients next time. Lets all try this cute sandwich this week. What a fun idea for lunch!

We will use other ingredients next time. Lets all try this cute sandwich this week. What a fun idea for lunch!
Kaylee enjoying her sandwich
February 24, 2015
Chinese New Year Inspiration Bento
Hello everyone! We are celebrating the Chinese New Year now and it is one of the most important celebration when we lived in Malaysia. We would celebrate it for at least 2 weeks starting from the 30th day on the Chinese Calendar (the last day of the month / Chinese New Year eve). This is the time where everyone would go home for a reunion dinner and have a big feast! Back in Malaysia, we usually would have a big hot pot of fish, chicken and vegetables. Kids would get red packets with some money in it for luck! We would cut our hair, clean our homes and buy new clothes. It is a really fun time especially for kids.
It is the year of the Sheep this year so I'm finding a lot of really cute sheep bento box inspirations that I'm excited to share with you.

The year of the Sheep from Little miss bento. Arent they so cute? Its almost cruel to eat them!

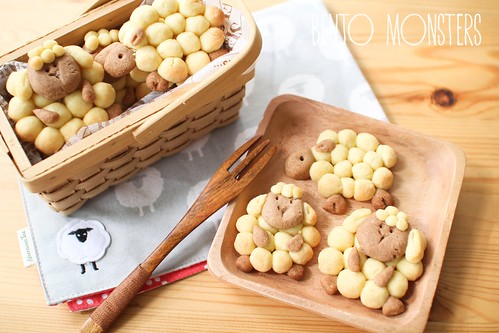
Mashed potatoes sheep and cookies from Bentomonsters

little lamb bento from cuteobento

and this innocent looking lamb with a little bow (like thelittlebow ^^ ) from Chicchi no ohanaben
I wish all of you a Happy New Year with hope that you will have many blessings in 2015!
It is the year of the Sheep this year so I'm finding a lot of really cute sheep bento box inspirations that I'm excited to share with you.
The year of the Sheep from Little miss bento. Arent they so cute? Its almost cruel to eat them!
Mashed potatoes sheep and cookies from Bentomonsters
little lamb bento from cuteobento
and this innocent looking lamb with a little bow (like thelittlebow ^^ ) from Chicchi no ohanaben
I wish all of you a Happy New Year with hope that you will have many blessings in 2015!
November 21, 2014
Pop a point color pencil
We just love the stacking multi-color pop-a-point color pencil! It reminds me of my childhood. I remember when I was little I would beg and beg and beg my mom to buy me a few pop-a-point color pencils for me to 'display' in my pencil case. They come with a few colors and I would keep them so carefully. I treasure them so much I hardly use them. That is how much I love stationery when I was growing up! Each pencil comes with blue, yellow, green, purple, pink, yellow.. and we'd have to keep popping the colors to reach the one that we want. Sometimes we exchange it with our friends too. Back then.. happiness is really just a new color pencil J
Were pop-a-point color pencil part of your school supply arsenal back in the day?

Were pop-a-point color pencil part of your school supply arsenal back in the day?
November 18, 2014
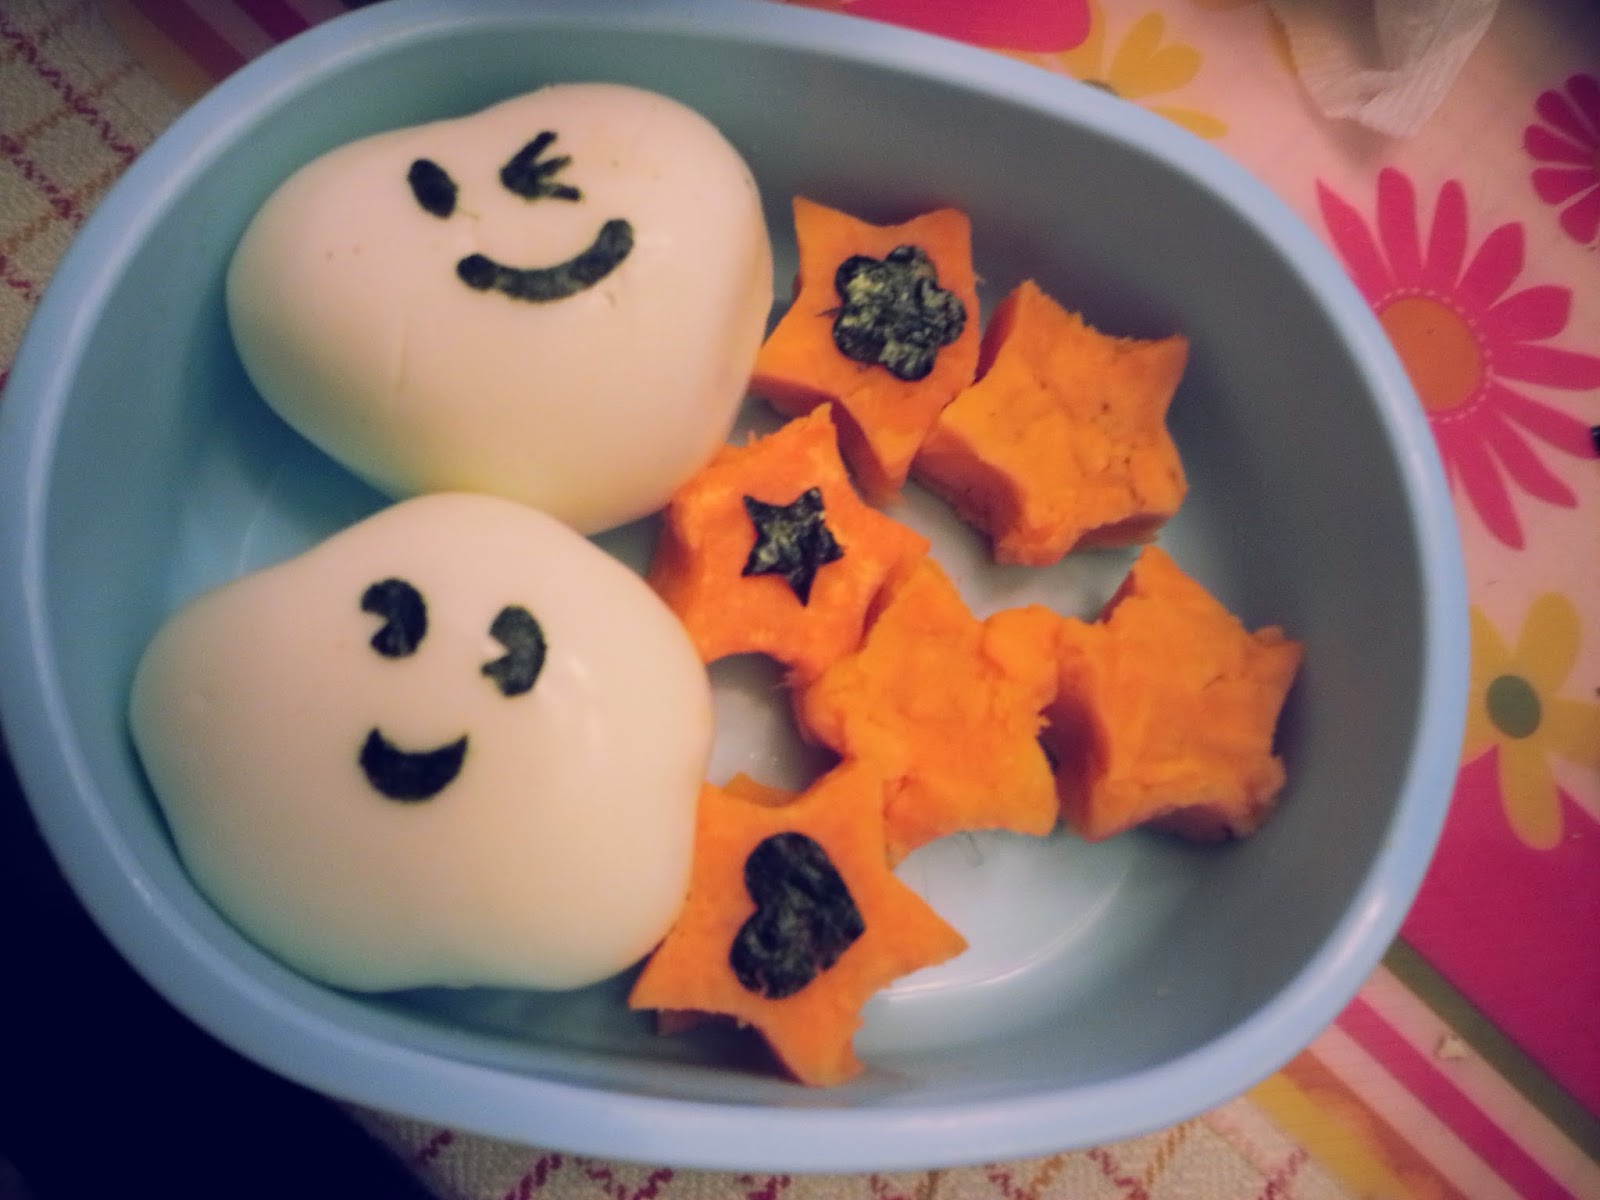
Sweet Potato Stars
We did not have a lot of time this morning to get ready. So I got 2 hard-boiled eggs and using the mold, made them into heart shape and star. (you can see the instructions here). To fill the rest of the Bento, we made stars from sweet potatoes. Kaylee punched the seaweed stickers and placed them on top of each of the sweet potatoes stars as decorations.
To make the sweet potatoes, you'll need
1. sweet potato
2. cookie cutter. (any shape that is the size of the potato: We chose the star shape because it is Kaylee's favorite.)
3. Paper Towel
First, cut the sweet potato into several pieces. Then, wet the paper towel and use it to cover the sweet potato. Place the sweet potato in the microwave and heat it on high for 2 - 3 minutes, depending on the size of the sweet potato. You may have to reheat it for an additional minute if you find that the sweet potato is still hard. Next, run the sweet potato under the cool running tap water (be careful when you remove the sweet potato from the microwave - it can be really hot!). Once its cooled down, peel the skin off.. and stamp the cookie cutter on the sweet potato! For the left overs, gather them all together, if some are mashed - its ok! - just fit all of it together into the cookie cutter to make a shape.
Enjoy the cute sweet potatoes! They are delicious and full of nutrition!


Subscribe to:
Posts (Atom)